Introduction
As I mentioned in my previous post, my new favorite programming language is Kotlin. I particularly like it because it has much of Python’s flexibility but the speed of Java, an awesome combination. I’ve done a few execution speed comparisons and find that for dynamic simulations of my chemical engineering models, Kotlin is 10-15 times faster than Python.
Now, execution speed is not everything. Python’s ease of use and rich library of readily available packages account for a great deal of this language’s popularity. I described in a previous blog post how one can create virtual environments and use pip to safely download packages and manage their dependencies. This is a big deal and a huge advantage for Python. In particular the numerical package numpy and the plotting package matplotlib are hard to beat.
So the purpose of today’s post is to ask what are the Kotlin equivalents to virtual environments, pip, numpy and matplotlib? The short answer is Gradle and Lets-Plot. I elaborate below.
Gradle
Gradle is an open-source build automation tool (https://gradle.org). You can download Gradle separately and use it to build almost any software project. Personally I use the plug-in provided in JetBrains IntelliJ IDEA tool. Since it took me a bit of research and tinkering before I figured out how to use Gradle, I decided to share my findings here and perhaps help others who are new to Kotlin and Gradle.
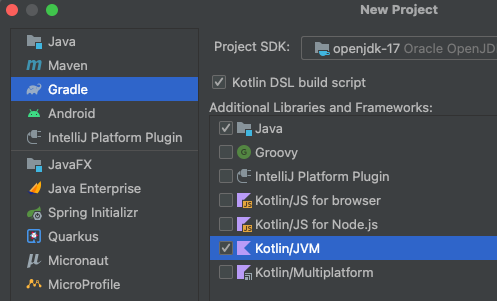
The first step in the process is to create a new Gradle project from IntelliJ. This looks as follows:
The next step is to give the project a name. I call this ColumnSimulation since I will be constructing a dynamic simulation of a distillation column with PID controllers.
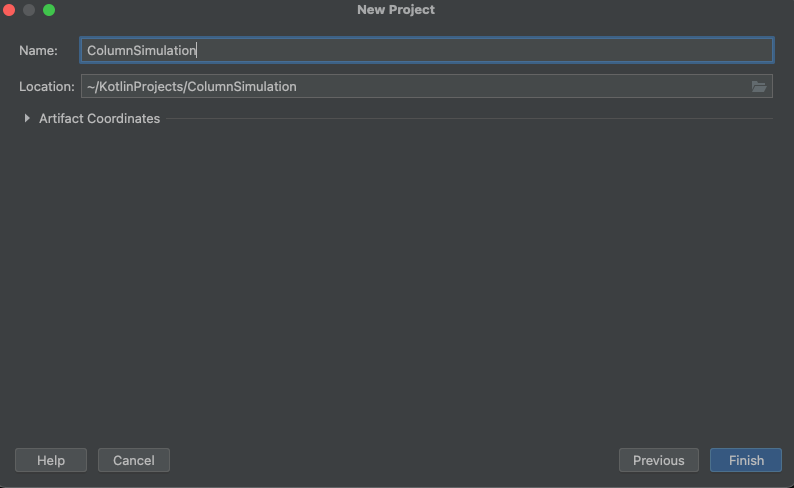
After clicking “Finish” I have a ready-made Gradle project that I can start populating with source code. But before I do that I’d like to link this new project to another Gradle project where I have most of my reusable process and instrument models. This other project I’ve named SyMods. This is how I link the two together.
First click on the little icon at the bottom left corner of the IntelliJ IDE. From the pop-up, select Gradle as in the picture below.
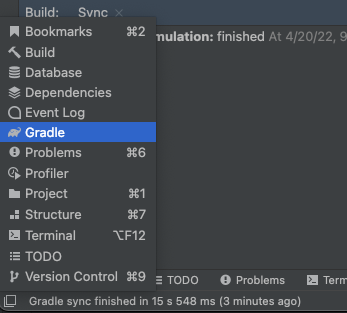
This opens the Gradle window on the right hand side of the IDE. The ‘+’ sign at the top of the Gradle window allows you to add another Gradle project to be linked with the first. By selecting the “build.gradle.kts” within the SyMods project, I can now add this project as a companion project to my newly created ColumnSimulation project.
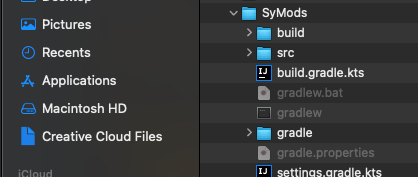
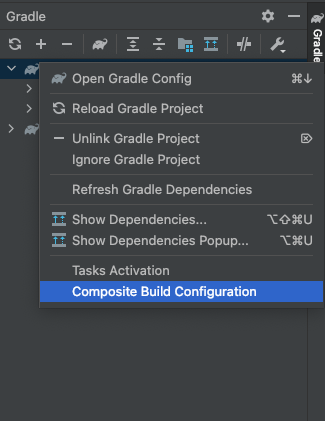
Both projects then show up in the Gradle window. By right-clicking on the ColumnSimulation project I can tell the build system that I want a “Composite Build Configuration”. Both projects are then built together.
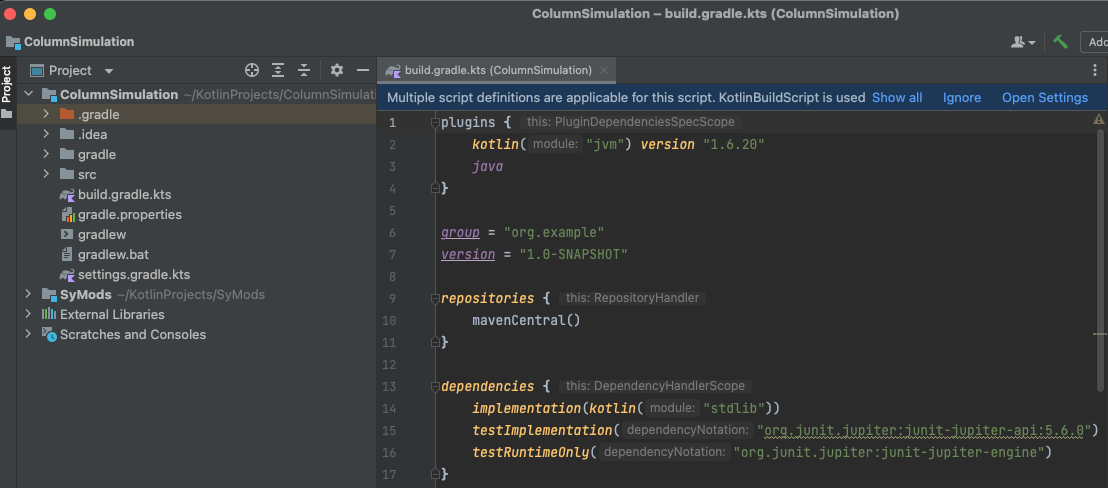
I close the Gradle window and focus on the Project window on the left side of the IDE. It looks like the picture below where I have the “build.gradle.kts” file open for the ColumnSimulation project. I now add some dependencies particularly for plotting.
Lets-Plot and Other Dependencies
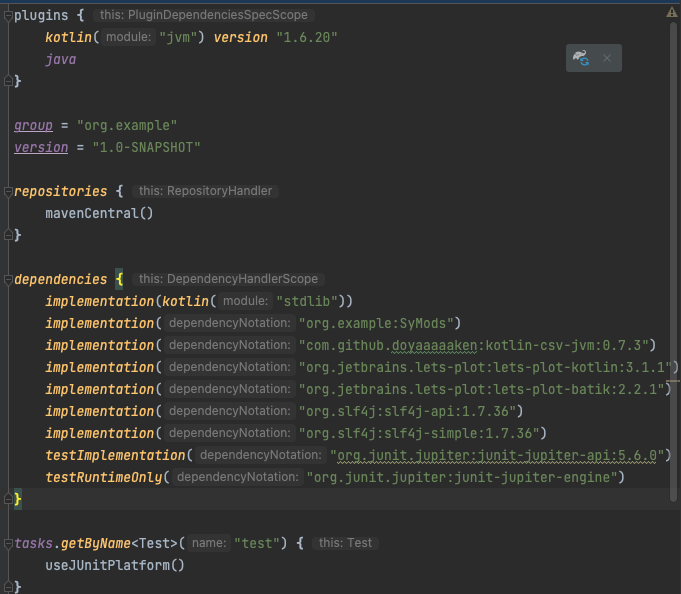
One of the beauties of Gradle is that it manages external libraries and dependencies for you. All you have to do is find the URL to the particular library you want to include and add this to the dependency section of the build.gradle.kts file. Below I show how I have added the appropriate links for JetBrains’ Lets-plot library. I also added a library for working with csv files and finally told the ColumnSimulation project that I will be importing models from my own project SyMods (that I previously linked and will be built along with my ColumnSimulation project).
We are now ready to write some application code. Notice that by having my “library” project, SyMods, available as a linked project I can make changes in the library as if I were working on it separately. This is very useful since I often discover some features in the application that could be reused and thus belong in the library.
Summary
Kotlin has proven to be an effective language in writing dynamic simulation models. To manage projects with Kotlin and to provide external libraries and dependencies, Gradle is the preferred tool. I have shown how to make a Gradle project, link it to other projects and include external dependencies for reading csv-files and plotting.